Pineapple Upside Down Cinnamon Rolls

Pineapple Upside Down Cinnamon Rolls-001

Follow my blog with Bloglovin
You may have heard me say more than once that I lov(ed) Twinkies and Ho Ho’s and the like. basically, if it was Hostess, I was there, preservatives or not. I like to delude myself by saying that with all the Hostess cakes I’ve eaten in my life, I should have enough preservatives in me to live to be 400. So when Hostess went bankrupt, I was devastated. I held candlelight vigils every night for a month and still wear the “hair” shirt I made out of old ho ho wrappers.

So when I heard Hostess was coming back in July (bought by some company or another) I stopped the candle light vigils, bought a helicopter and had it flying a “Twinkies are coming back!” banner behind it and knitted a throw rug with a Ding Dong design in the middle.

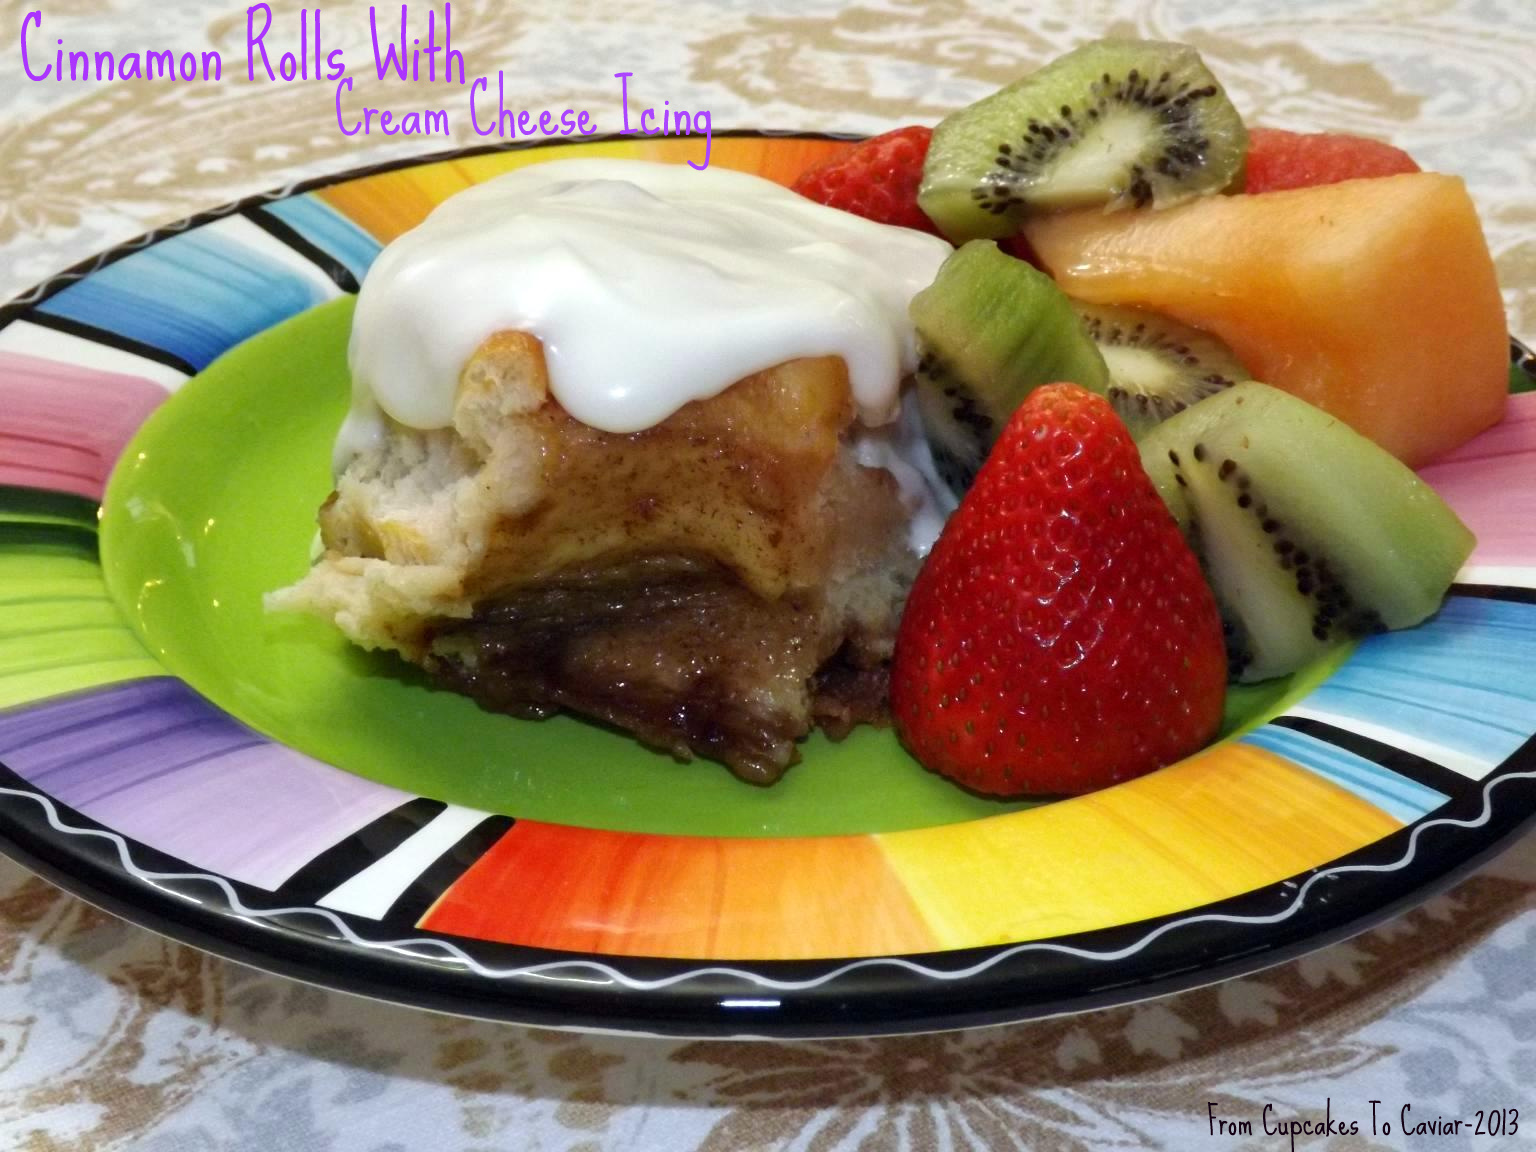
One of the things I sheepishly admit to liking from them was their packs of cinnamon rolls. That slick icing you could pull off in one horrifyingly large piece, the somewhat dry rolls (especially once you pulled off and ate the vaguely plastic icing)… it was all high on my list of “I have no idea why I like this, but I do” foods, along with gummi candies, combos, liverwurst and lemonheads.

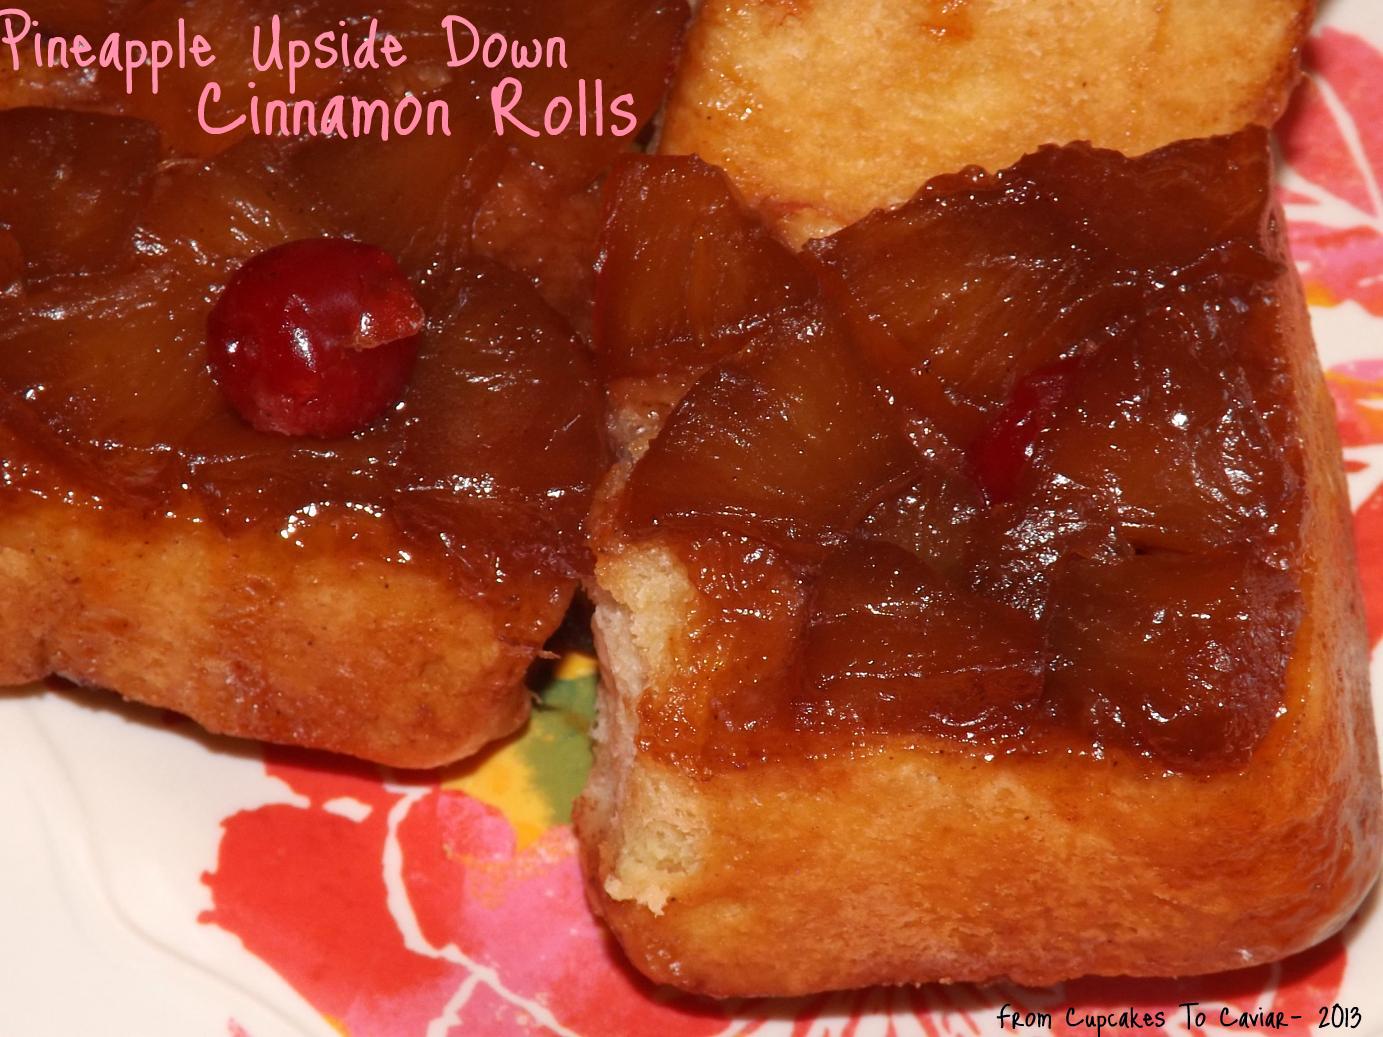
But even I’m not totally delusional. I know that homemade cinnamon rolls are better. And YOU all know ME.  I can’t leave well enough alone and just make something the normal way. I’m genetically mutated and must screw around with a recipe. So I made Pineapple Upside Down Cinnamon Rolls. I had seen the recipe originally in a cookbook and it intrigued me. Well, intrigued was all it could do. The recipe totally sucked.  The dough was soupy and even after adding a couple extra cups of bread flour, was far too sticky to work with and I knew if I kept going, i’d 1) waste more ingredients and 2) even if I got decent textured dough, it would end up overworked. So I tossed it and started over with my tried and true recipe for sweet roll dough from The Fannie Farmer Baking Book, just updated a bit for a stand mixer. Then I made the same type of topping I put on a upside down cake, just different ratios and Bobs your uncle… Pineapple Upside Down Cinnamon Rolls. These are a wonderfully flavored tender yeast roll with a delicious cinnamony/ buttery filing then topped with a buttery/sugary/pineappley (lots of y’s here) topping. Basically, you get two desserts in one for the calories of one dessert PLUS you can feel all self righteous if you have this for breakfast. This is a longer recipe but it comes together fairly quickly and it’s definitely worth the time

You know the drill…

Pineapple Upside Down Cinnamon Rolls

  • Cinnamon Rolls-
  • 2 packages dry yeast
  • 1/4 cup warm water
  • 1 cup milk, warmed
  • 1/2 cup sugar
  • 2 teaspoons salt
  • 1/2 cup unsalted butter, room temp
  • 3 eggs, warmed up in a bowl of warm water
  • 51/4 to 51/2 cups flour
  • Filling-
  • 1 stick unsalted butter, very soft but not melted
  • 1 cup sugar
  • 2 tablespoons cinnamon
  • Topping-
  • 2 20 ounce cans pineapple chunks in juice, well drained
  • 2 sticks unsalted butter
  • 1 1/3 cups dark brown sugar
  • 1 small jar maraschino cherries, drained (optional)
  1. Sprinkle the yeast over the warm water in a small bowl. Stir and let sit for a few minutes so yeast can dissolve.
  2. Combine the milk, sugar, salt and butter in the bowl of a stand mixer and beat will. Stir in the dissolved yeast. Put on the dough hook- add 2 1/2 cups of the flour and beat until the dough comes together in a shaggy mass. Add another 2 1/2 cups flour and on low speed, mix until the dough is smooth and firm.
  3. Feel it with your fingers and if it is tacky (unless your house is very humid, 5 cups should be fine. The original ingredients were for a hand mixer. A stand mixes better and you can usually use a touch less flour to get a good dough.) add about another 1/4 cup flour. Mix at low speed for about 5 minutes. Turn the dough out into a greased bowl; turn the dough to make sure all sides get greased, then cover with plastic and set aside. Let rise until doubled in bulk.
  4. Meanwhile, make your topping and filling. For the filling, in a small bowl, combine the one cup sugar and 2 tablespoons cinnamon. Set aside.
  5. For the topping, combine the butter and brown sugar in a medium saucepan. Bring to a simmer over medium heat, stirring occasionally to mix the sugar. Add the drained pineapple, stir and simmer over medium heat for five minutes. Mixture will seem thin but it will thicken and caramelize as it cooks in the oven.
  6. Grease a 13×9 inch baking pan and preheat oven to 350 degrees. Pour the topping in and make sure to spread the pineapple out to cover the bottom of the pan. If using cherries, randomly top the pineapple mixture with some cherries.
  7. When dough has risen to double it’s original bulk, punch down. Turn out onto a floured board and knead lightly for a minute or so. Roll out into a rectangle of approximately 28 by 12 inches. It doesn’t have to be perfect.
  8. Spread the top of the dough with the very soft butter, Then sprinkle with the cinnamon/sugar mixture. Starting from one of the long sides, roll up tightly like a long jelly roll. Cut the dough into 15 pieces and lay each piece into the prepared pan. You should have the five rows of 3 rolls. Cover lightly with plastic or a damp towel and set aside to rise again. Let rise for about another half hour or until almost doubled in bulk.
  9. Bake at 350 degrees until the rolls are puffy and golden.
  10. Let sit for five minutes then invert pan over either some sheets of foil or a larger pan if you have one. Let excess topping drip down for a minute.
  11. Serve warm… cold…room temp… in a cave… on a horse…eat them any way, Sam I am.

Copyright Notice: From Cupcakes To Caviar images and original content are copyright protected. Please do not publish these materials anywhere without prior permission.

Butterscotch, Brown Sugar & Cinnamon Scones With A Maple Glaze

Butterscotch Brown Sugar & Cinnamon Scones With A Maple Glaze

Butterscotch Brown Sugar & Cinnamon Scones With A Maple Glaze


I remember the first time I read about scones. it was when I was in my early 20’s, way back before the days of the internet and 900,000 recipes about ANYTHING.  I was reading a cheap romance set in Scotland. The heroine (whom I remember as being a total spoiled pain in the arse) was whining about being hungry and the maid of the hero (whom I remember as being a total sexist pain in the arse) gave her an oat scone. Since I’ve been fascinated with food culture for most of my life, I was intrigued at the idea of a scone. So when I finally found a recipe, years later, I just had t make them.

They sucked.

The first ones I ever made were made with an oat flour (ground up oatmeal), raisins (they called for currents but those weren’t easily found here in the states back in the day), butter and other assorted ingredients I can’t recall. They were dry as dust, tough and crumbly all at the same time with a taste that was like…well… ground up oatmeal with some raisins in it.

Being me though, I didn’t give up. Just like with bread pudding, which I hated when I first tried it, I had to keep trying. Now, I absolutely love scones. You can find quite a few of them here on the blog.

These are quite yummy. They are reminiscent of the packs of instant brown sugar and maple oatmeal that we all ate as kids (and that I personally still love). But no dry as dust texture. They are soft and flaky (I slightly overcooked mine by accident and they are still good) and the cinnamon brown sugar flavor accented by the maple glaze is outstanding (am I the only one who every single time I use the word outstanding I think of the old saw {that made no sense} about “yeah, he was outstanding… outstanding in the field”. WTH does that even mean???). The butterscotch and cinnamon chips in them just gives them that “I can eat these for breakfast OR dessert” feel. All in all, a very good scone.

You know the drill…..

Butterscotch, Brown Sugar & Cinnamon Scones With A Maple Glaze

  • 3/4 cup chopped toasted and cooled pecans
  • 1 1/2 tablespoons cinnamon
  • 1/4 cup dark brown sugar
  • 4 tablespoons unsalted butter, chopped into small pieces,cold
  • 1 tablespoon solid shortening, chopped into small pieces, cold
  • 2 cups flour
  • 1 teaspoon cream of tartar
  • 1/2 teaspoon baking soda
  • 1/2 teaspoon salt
  • 1/4 cup sugar
  • 1/4 cup buttermilk
  • 1/2 cup heavy cream
  • 2 tablespoons vanilla extract
  • 1/2 cup butterscotch chips
  • 1/2 cup cinnamon chips
  • sanding sugar for sprinkling on top of scones (optional- I like the touch of sweetness and mild crunch)
  • Glaze-
  • 1 cup powdered sugar
  • 1 teaspoon cinnamon
  • 3/4 teaspoon maple flavoring
  • 3 to 6 tablespoons heavy cream (may need more or less to get to drizzling consistency)
  1. Preheat oven to 400 degrees and lightly grease a large baking sheet.
  2. In a small bowel, mix together the pecans, brown sugar and cinnamon. Set aside
  3. Mix together your buttermilk, cream and vanilla extract and set aside.
  4. Mix together your flour, baking soda, cream of tartar, sugar and salt. Using a pastry blender, cut the butter and shortening into the flour until it is fully combined and in tiny pieces. Stir in the pecan/brown sugar mixture.
  5. Make a small well in the center. Pour in the buttermilk mixture all at once. Using a wooden spoon, stir together to make a moist cohesive dough. Make sure all the flour is combined in and you don’t have dry streaks. Gently fold in the butterscotch and cinnamon.
  6. Dump the dough out onto a lightly floured board.  Pat into a rectangle of about 1/2 inch thick.
  7. Using a sharp knife dipped in flour or a pizza cutter (they work great for cutting doughs) cut the dough into either 8 large scones or 12 smaller ones. Your choice there. If you look and think that 12 is too small, remember that these will spread as they bake.
  8. Lay the scones, close together but not touching, on the prepared baking sheet. Sprinkle with the sanding sugar if desired.
  9. Bake at 400 for about 14 to 18 minutes for large scones or until browned and firm on top. For small ones, bake for about 10 to 13 minutes or until browned and firm on top.
  10. Let cool on a wire rack until completely cool.
  11. For glaze, in a small bowl, combine all glaze ingredients and using a whisk, whisk well until mixture is smooth and creamy. Drizzle over cooled scones.

Copyright Notice: From Cupcakes To Caviar images and original content are copyright protected. Please do not publish these materials anywhere without prior permission.

Double Ginger Citrus Pear Bread

Double Ginger Citrus Pear Bread

Double Ginger Citrus Pear Bread


I mentioned this bread on my facebook page a week or so ago when I gave the choice between it or scones. The scones won. 😛 But I finally got around to making the bread yesterday.

I wish now that I’d waited until today to make it. Mother nature seems to be confused as to month and it’s rainy, chilly and totally ICK here right now. I think we MIGHT have made it up to 50 degrees. And while I know that that would still seem balmy to some in May and would have to me too had I stayed in my hometown of Chicago, here in Kentucky, high 40’s in May is COLD darn it! So having the oven on and baking sounds like a great idea.

I wasn’t sure about this bread when I first made it yesterday. You know how it goes… you make a quick bread, tell yourself to let it cool so it will slice better, then end up cutting it when it’s warm anyway because you just can’t resist. This however is one of those quick breads that NEEDS to meld for a day. yesterday, it seemed rather bland and boring and I wasn’t even sure I would blog about it. After sitting overnight however, I tried a piece and it was was quite good. It’s moist and dense; almost pound cakeish in texture, plus the ginger flavor is more pronounced as is the pear. Make sure though, that you use ripe flavorful pears in this.  And I think that next time I make this I will add about a 1/2 teaspoon of fresh nutmeg. It just needs a bit of spice.

Make sure you actually grease and flour your pan. With the pear and crystallized ginger in it, you’ll end up with parts sticking to the bottom if you just use cooking spray.

Double Ginger And Pear Quick Bread

  • 3 ripe pears, chopped (I left the peel on; your choice)
  • 3 tablespoon freshly grated ginger
  • 1/4 cup finely chopped crystallized ginger
  • 1/3 cup buttermilk
  • 1 tablespoon vanilla extract
  • 1 tablespoon lemon juice
  • zest of one lemon
  • zest of one orange
  • 2 cups flour
  • 1 teaspoon baking powder
  • 1/2 teaspoon baking soda
  • 1/4 teaspoon salt
  • 1/4 cup unsalted butter, room temp
  • 1/4 cup vegetable oil
  • 1 cup sugar
  • 2 eggs
  1. Preheat oven to 350 degrees. Grease and flour a nine inch loaf pan.
  2. Stir the pears, ginger and zests together in a small bowl.
  3. Mix together the buttermilk, vanilla and lemon juice in a measuring cup.
  4. In a medium bowl, mix your dry ingredients.
  5. In yet another bowl (I know I know 😛 ) beat together your butter, oil and sugar. Beat in the eggs, one at a time, beating well after each.
  6. Add the flour mixture, alternating with the buttermilk mixture, beating on low speed, just until combined. Fold in the pear/ginger mixture.
  7. Pour the batter (it’s a fairly thick batter) into the prepared loaf pan.
  8. bake at 350 for about 50 to 60 minutes or until the top is a golden brown color, firm to the touch and a skewer inserted in the middle of the loaf comes out clean.
    Cool on a wire rack in the pan for about five minutes, then carefully run a knife around the edges to loosen. Turn out onto the rack to finish cooling.
  9. Now you can wrap it, wait a day and try it after flavors have blended or cut it now…but seriously, I advise the days wait. It’s delicious after the rest period 🙂

Print Friendly and PDF

Chocolate Chip Double Berry Scones

Chocolate Chip Double Berry Scones 2-001

I can hear the outcry now… “MORE scones, lady!!!??? What the heck?? Can you do anything but scones or citrus pies or risotto!?”

Yes. yes, I can. But I wasn’t thinking the other day when I, on my Facebook page asked everyone which they would prefer- these scones or a quick bread I am trying. They chose the scones. Sooooo, being a woman of my word, I made them. Because honesty is just how I roll. Well, when I trip on our land, downhill quickly is also how I roll but I won’t blog about that. Though photos would probably be hilarious.

Moving on- been interesting in our household lately. My (very pregnant) daughter and her boys are with us through mid August while her husband goes through Basic Training and AIT (the on the job training for whatever you will be doing part of the military) so having 2 extra little ones (they are 3 and 6) has been chaotic to say the least. But I love knowing that when they move, they will, for a time at least, until it fades, have some memories of living with gramma and grampa. My daughter is due in a few weeks so I’ll have time with the baby (girl) for a while too 🙂

Plus, I’ve been having some health issues again. Not gonna go into detail here yet but I’ll cue you all in when things are more settled as to treatment. Until then, I’m just gonna continue to bake fattening things for all of you. Why? Cause I lurves you of course!!! Seriously. You have no idea what it means to me to know that people actually come here to my tiny blog, read my inane words and sometimes actually even make the foods I post.

These scones turned out delicious. I got the base recipe from The Pastry Queen Cookbook (you should have noticed by now that I love this cookbook) but changed it around. I just KNOW you’re surprised at that news. The only problem I had (which is my fault not the books) was shape. After I added the berries, I didn’t want to knead the dough, thus mushing the berries and toughening the dough, so I just reshaped it. BUT… I wasn’t able to get it back into a decent circle. so I tried making it more rectangular and cutting the scones from that. It turned out rather laughable 😛 These taste absolutely amazing… light, tender, flaky with a perfect mix of berries and chocolate and an orange glaze that just complements it all. But the way they look? Kinda wonky lol. But I promise you; you won’t care once you make some and taste them how they look. Also, you may have better luck shaping the dough than I did ANYWAY thus negating the issue. So don’t let looks fool you. Just look at the nicely glazed surface… see the pieces of berry peeking out alongside some chocolate. Then go bake. And I promise… no more scones…. for a few days anyway 😛

Chocolate Chip Double Berry Scones

  • 3 cups flour
  • 1 cup sugar
  • 1 tablespoon baking powder
  • 1/2 teaspoon salt
  • 10 tablespoons unsalted butter, COLD
  • 1 tablespoon vanilla extract
  • 1 1/2 cups heavy cream
  • zest from one large orange (about 1 to 2 tablespoons)
  • 1 cup semi sweet or bittersweet chocolate chips
  • 1/2 cup fresh raspberries
  • 1/2 cup fresh blackberries
  • Glaze-
  • 1 cup powdered sugar
  • 2 teaspoons orange zest
  • 1/3 cup orange juice
  1. Preheat oven to 375 degrees. Line a buttered baking sheet with parchment paper then butter the paper.
  2. In the bowl of a stand mixer fitted with the paddle attachment (as always, you can use these directions with a hand mixer), combine the dry ingredients on low speed, including the orange zest.
  3. Cut the butter into small pieces, then add to the flour. Beat on low speed until the butter is in small pea sized pieces. Then add in 1 cup of the cream and the vanilla and continue beating on low speed. You want the dough to come away from the sides of the bowl in a clean ball of dough, no floury remnants left behind. If it still looks dry, add more cream, about a tablespoon at a time until it forms the dough ball.
  4. Turn out onto a lightly floured board and gently knead the chocolate chips into it. You’re not trying to work the gluten up like in bread dough. That will make the scones tough.
  5. When the chocolate is incorporated, gently pan the dough out into a fairly thin circle or rectangle. Lay the berries down on one side of the dough, then fold the other side down over them. Press gently to seal.
  6. Reshape the dough (circle if you want wedges, rectangle if you want squares or diamonds) and cut into either 10 wedges or if making squares or diamonds (for the diamonds, cut into squares then cut them in half diagonally), cut into 12 pieces. Brush each with some of the leftover cream and sprinkle with sugar.
  7. Bake at 375 for about 15 minutes for wedges or 10 to 12 minutes for squares or diamonds. You want them a nice golden brown on top.
  8. For the glaze- in a small bowl, mix together the glaze ingredients. Whisk well to get rid of lumps.
  9. Pour the glaze out onto a shallow lipped plate.
  10. Dip the top of each scone into the glaze. Let dry for about ten minutes then dip each one again. Let dry a bit before serving though when they are warm and sticky they are awfully hard to resist 😀

Print Friendly and PDF

Chocolate, Cherry & Pistachio Scones

Chocolate, Cherry & Pistachio Scones

Chocolate, Cherry & Pistachio Scones


I’ve mentioned a couple of hundred times by now that I’m not one of those people who does things by the seasons. Nope, I’m that weirdo at the grocery store with no coat and flip flops when it’s 20 degrees out. I’m the reason you’re smelling bbq and woodsmoke in January and suddenly craving grilled chicken. I’m the one making heart cookies in August. While at the same time making a nice comforting warming beef stew or chili. I’m that person posting Pumpkin bread in May and having everyone who comes here (all two of you hehe) wonder what the heck I’m on and why I’m so bass ackward.

Yes. I’m weird. This however is why you like me, right?

*crickets*

From what I’ve seen, most people tend to seem to bake scones during the Winter, many times even around the holidays. This may have something to do with everyone being far wiser than I and not turning on their ovens in the middle of a heat wave. I have never claimed wiseness though so it’s all good. I claim only insanity, a warped sense of humor and an unhealthy love for Cheetos and almost any sort of Gummy candy (right now my current addiction is These Brachs Juicy Berries Gummies. Oh my gosh, I love them and talk about lack of wisdom… it’s unwise for a bag of them to be near me or I’ll eat every.single.one.

But… today wasn’t about gummy candy (tonight when I watch Glee however, all bets are off). Today was about scones. This recipe was originally an Ina Garten one but I found it long ago on the now defunct blog “Gingerbread Bagels”. I don’t know the blog closed of where Lindsey, the owner, disappeared to, but I still think of her and hope she’s ok. Originally, this was just dark chocolate and dried cranberries but we all know I’m genetically incapable of doing a recipe the way it was written. So now I have left my mark on this one and love how I changed it 🙂

These scones are probably my favorite scones ever. They are flaky and tender… a little bit crispy on the outside and tender on the inside. The chocolate and cherries go so well together and the orange zest and almond extract add a lovely flavor to these. Add in the yummy pistachios and the bit of crunch they add and it’s scone Heaven.

You know the drill. Get to baking!

Chocolate, Cherry & Pistachio Scones

  • 1 1/2 cups mini chocolate chips
  • 1 5 ounce bag dried cherries
  • 1/2 cup chopped salted pistachios
  • 2 cups flour
  • 1/3 cup sugar
  • 1 tablespoon baking powder
  • 1 teaspoon salt
  • 2 teaspoons orange zest
  • 1 1/2 sticks COLD unsalted butter, diced
  • 1/2 cup COLD heavy cream
  • 2 large eggs
  • 1 tablespoon vanilla extract
  • 1 teaspoon almond extract
  • Glaze-
  • 1/2 cup powdered sugar
  • 1/2 teaspoon vanilla extract
  • 2 to 3 tablespoons heavy cream (may need more or less to make glaze drizzling consistency)
  1. Preheat oven to 375. Line a buttered baking sheet with parchment paper and then butter the paper.
  2. Combine the flour, baking powder, salt and orange zest in the bowl of a stand mixer. Add in the cold butter and mix on low speed with the paddle attachment until the flour has only small lumps the size of peas left in it. (Alternately, do the same with a hand mixer or pastry blender)
  3. Whisk together the 2 eggs, 1/2 cup cream, vanilla extract and almond extract. Pour slowly into the flour mixture and continue mixing at low speed until dough comes together in a sticky ball from the side of the bowl.
  4.  Dump onto a lightly floured board. Pat down into a circle of about 3/4 of an inch thick. Cut into 8 wedges with a lightly floured knife or pizza cutter.
  5. Lay close together but not touching on the baking sheet. They will rise and touch as they bake and you’ll have nice soft sides where they do, crispy ones where they didn’t.
  6. Bake at 375 for about 17 minutes or until they are nicely browned and firm on top. Don’t over bake or you’ll lose that great texture!
  7. When done, let cool for about minute in the pan, then carefully transfer over to a wire rack to finish cooling.
  8. For glaze, simply whisk together all the glaze ingredients in a small bowl. Drizzle over the cooled scones.

Print Friendly and PDF

Extra Rich Corn Muffins With Homemade Honey Butter


Extra-Rich-Corn-Muffins-With-Homemade-Honey-Butter

Extra-Rich-Corn-Muffins-With-Homemade-Honey-Butter

I think I’m completely incapable of making a recipe that is 100% good for me (you, my family, the rest of the world). I instinctively search out the worst for you version of…well… everything. Ice cream? I go for the high fat premium stuff. My homemade bread puddings? I have to cover them in a puddle of heavy cream and if the recipe called for making it with low fat milk, you’d better believe I’ll be substituting cream. I am not, surprisingly enough, a huge sugar fan. My weakness is anything creamy and/or buttery. Richness is my downfall.

That of course is why, even though I lost almost 50 pounds last year, I’m still overweight lol. I am, I think, totally unwilling to live a life that isn’t filled with rich and creamy foods. This and the fact that I’m old, not that pretty,  saggy and practically toothless is the reason that the modeling world never need worry about me taking it by storm and shoving out all the young girls. However, if I were to give all the supermodels one or eight of these muffins, they too would end up with my love for rich foods and that would be the end of the modeling world as we know it. Hey… I may be onto something here. THIS is the way to get normal sized models featured more. Just FEED the poor women; make them realize how yummy food is lol.

And these are pretty yummy. They come from The Pastry Queen cookbook which is a damned awesome cookbook and one that I plan on using often. The only thing I would change about these would be the ratio of flour to corn meal. They could use a bit more of the cornmeal flavor, less of the flour. So next time I will probably increase the cornmeal one cup, decrease the flour one cup. I also cut the sugar down to about 1/3 of a cup because I am of the school that says cornbread should either be not sweet at all or just barely. ANDDDDDD, I used frozen corn because it’s too early in the year for fresh here and canned corn should be outlawed… nasty nasty stuff.

Extra Rich Corn Muffins

  • 3/4 cup unsalted butter, melted
  • 3 cup heavy cream
  • 3 large egg
  • 3 1/2 cups flour
  • 1 1/2 cups cornmeal
  • 1 cup sugar (I used 1/3 cup)
  • 2 tablespoons baking powder
  • 1/2 teaspoon salt
  • 1 cup fresh, frozen or canned corn (optional)
  • 2 cups shredded sharp cheddar cheese (optional- my addition)
  • 1/4 cup canned chopped green chiles (optional- my addition)
  • Honey Butter-
  • 1 cup softened unsalted butter
  • 1 cup honey
  • 1 teaspoon cinnamon (optional- I prefer it without but some people like the addition of cinnamon)
  1. Preheat oven to 350 degrees. Grease or line 24 muffin cups. I used 12 muffin cups and a 8 count mini loaf pan.
  2. Pour the cream, butter and eggs into the bowl of a stand mixer (this can all also be done with a hand mixer or even by hand if you have strong arms 😛 ) fitted with the paddle attachment.
  3. Add the flour, cornmeal, sugar, baking powder and salt on top. Mix at medium speed just until the ingredients are combined and not lumpy. Stir in the corn (and the cheese and chiles if using)
  4. Scoop the batter into the prepared pans, filling them about 2/3 full. This is a very thick batter, almost more dough like than batter like so don’t think you goofed up when it’s thick.
  5. bake at 350 degrees until they are a light golden brown and spring back when touched, about 15 minutes.
  6. Turn out onto a wire rack to cool slightly but these are best served warm, like most muffins. They reheat nicely in the microwave however.
  7. For the honey butter, put the butter and honey in a small bowl (the cinnamon too if using). Beat at medium speed until smooth and creamy. taste and add more honey if you like it sweeter. Store this in the fridge covered will as it will pick up refrigerator odors if not covered.

Print Friendly and PDF

Extra Rich Cinnamon Rolls With Cream Cheese Icing

Extra Rich Cinnamon Rolls-001

Surprise, surprise… a recipe from me with the words extra rich in the title. Never expected that huh? Not with the dearth of fattening recipes here. What makes these extra rich? Mashed potatoes in the dough. Get back here! Sheesh. Ever had potato bread? Same idea, different result. I didn’t make a batch of garlic mashed and shove the extra into cinnamon rolls *gags a little*. Mashed potatoes (plain, NOTHING added; just the taters) are very common in yeast bread. They add a richness to the dough but with no potato flavor. They also make the dough more tender and help it to rise better. matter of fact, when you make mashed potatoes, it’s a good habit to save some of the cooking water if you make yeast risen doughs often. You can sub it for part or all of the liquid (part is better if the original recipe calls for milk) and you will see an amazing difference in the finished product.

These cinnamon rolls were supposed to have pecans in the filling, but if you follow my facebook page at all, you may have seen my update about the two pans of burned pecans. Sigh. talk about idiocy. I put one in to toast then had a major “ooo, shiny thing!” moment and forgot about them. Slapped myself around for a bit then put in another pan. Words With Friends on facebook may or may not have had something to do with the other pan burning. Needless to say, after about 12 dollars worth of pecans torched, I was not trying again. So the rolls have raisins in half the batch. Feel free to sub pecans (I will put the amounts for either one in the recipe). Just stay away from word games when toasting them. Also, this makes a HUGE batch of rolls. I got 2 13×9 pans with 12 each and 6 more in a 8×8 pan. In my household which currently consists of myself, hubby, two teen boys, three boys 6 and under and a pregnant woman, they will get eaten. But in “normal” homes, you may want to cut this in half. Or make your neighbors happy.

This originally came from The Pastry Queen Cookbook. Adapted some for a stand mixer and ingredients changed a LITTLE but not much.

Extra Rich Cinnamon Rolls

  • 2 medium russet potatoes
  • 4 packets dry yeast
  • 3/4 cup plus 1 teaspoon sugar
  • 1 cup unsalted butter, melted
  • 3 large eggs
  • 2 teaspoons salt
  • 9 cups flour (I TOLD you this was big batch) (I actually used more like ten cups; it will depend on the moisture of your potatoes)
  • Filling-
  • 4 cups pecans, toasted for about 8 minutes at 350 degrees then coarsely chopped or 3 cups good quality raisins (not dried shriveled rocks)
  • 4 cups firmly packed brown sugar (I used dark brown)
  • 4 tablespoons cinnamon (no, that’s not a typo… look at the amount of ingredients and this makes sense)
  • 1 teaspoon nutmeg
  • zest from one large orange (optional)
  • 1 cup unsalted butter, melted
  • Icing-
  • 1 8 ounce package cream cheese, room temp
  • 1/4 cup heavy cream
  • 3 to 4 cups powdered sugar
  • 1 teaspoon vanilla extract
  • 1/4 teaspoon orange extract (optional)
  1. To make the rolls- fill a large pot with water and set on high to boil. Peel and chop the potatoes and add to the pot. Cook until the potatoes are tender. Reserve three cups of the cooking water, then drain off the rest. Mash the potatoes and set aside. Let the potato water cool until it is between 110 and 115 degrees.
  2. In a medium bowl,  combine the cooled potato water, yeast and the one teaspoon of sugar. Stir until the yeast is dissolved. Let sit until foamy, about five minutes.
  3. In a large bowl, whisk together the potatoes, 3/4 cup sugar, 1 cup melted butter, eggs, salt and yeast mixture.
  4. Pour mixture into the bowl of a stand mixer. Turn mixer onto low and add the flour, in 3 cup increments. If the dough still seems wet (you want slightly sticky but not obviously moist) add more flour, a 1/4 cup at a time. Don’t go over 10 cups. Again, it’s ok if the dough is somewhat sticky. If you make it too dry, the rolls will also be dry. Sticky dough equals tender moist rolls in the end.
  5. Place the dough in a large greased bowl, making sure to oil the top of the dough some and then cover with a clean towel. Place in a warm place to rise and let rise until doubled in bulk, about an hour.
  6. Meanwhile, mix together the brown sugar, cinnamon, nutmeg and orange zest (if using) in a large bowl. Prepare 2 13×9 inch pans by lining with foil then greasing the foil. Heat oven to 375 degrees.
  7. When risen, punch down dough then divide it  in half. On a floured board or counter, roll half into a 1/4 inch thick rectangle. Brush with half the butter,  sprinkle with half the brown sugar mixture and half the raisins or pecans. Carefully roll the dough up from one long end. Roll as tightly as you can.
  8. Using a sharp serrated knife, cut each roll of dough into 12 to 15 pieces. This will depend on whether or not your roll ended up bigger than 1/4 inch and looks like it is about the length of an adult python. Place 12 in each 13×9 inch pan. If you get more than 12 from each roll,  foil and grease a 8×8 inch pan and put the remainder in the 8×8 pan. Allow to rise until puffy but not quite doubled, about 45 minutes
  9. Bake at 375 degrees for about 25 minutes or until a nice light golden brown.
  10. Let cool in pan set on wire rack.
  11. For icing, combine icing ingredients in a medium bowl. Beat until smooth and creamy. Spread on slightly warm rolls. But first, eat about half of it straight off of a spoon then blame me when your husband asks why there is so little icing for the rolls.


Print Friendly and PDF


Ham, Cheddar And Herb Scones

Ham, Cheddar & Herb Scones

I’m feeding my inner Brit today…and my inner Scot… and my inner whatever other ethnicity likes scones. The thing is, in real life, I have not a drop of Brit or Scot in me as far as I know.  Lots of German, some French, a touch or two of Irish (I think it’s the good at bull**** part of me), some Native American and some African American. I am the quintessential mutt.

I like pretending I’m Scottish though. There is little more fun than going into a store and loudly talking in a Scottish accent. People gawk big time. One would think they had never seen a Scot walking around Wal-mart before. Ok, so maybe they haven’t. An Indian accent is fun too since I’m light haired and extremely light skinned and don’t fit the genetic mold of what one would expect from a person speaking with a thick Indian accent.

Most fun however is Russian. My husband is fluent or close to it in a few languages and we have a habit of going shopping and somewhere, ineveitably, he will begin speaking Russian, usually very loudly and usually pretending to be irate over something silly done by Americans.

I, not knowing a lick of Russian, end up as his straight man, using a thick Russian accent to tell him that he is in America now and to speak English and not act like he just came over from the old country. We are American now and he needs to speak the language! Again, the looks are priceless hehehe.

We don’t have very exciting lives.

And I am fairly sure we need to be institutionalized

But before that happens, I want to share this scone recipe (do you say scone rhyming with cones or scones rhyming with cons? I’m a cones person myself) with you. As much as I love sweet scones, savory ones have a larger portion of my heart and my waistline. This one is chock full of cheddar cheese, diced ham, some garlic, some green onions and some dried dill. These smell amazing as they cook and they taste even better than they smell. There is nothing like a fresh, warm scone drowning in butter… unless it’s a fresh warm scone drowning in butter, served with a cup of tea. My idea of Heaven involves both those things. It also involves   ice cream, whipped cream and Morgan Freeman and Ed Harris hand feeding me peeled grapes but that’s another story.

Ham, Cheddar And Herb Scones

  • 3 cups bread flour
  • 1 tablespoon sugar
  • 2 tablespoons baking powder
  • 1/2 teaspoon salt
  • 2 1/2 cups heavy cream
  • 1 cup diced ham
  • 1 cup shredded sharp cheddar cheese plus more for sprinkling on top
  • 1/2 cup sliced green onions
  • 1 tablespoon dried dill weed
  • 1/4 teaspoon garlic powder
  1. Grease the bottom of a nine or ten inch round cake pan. Preheat oven to 350.
  2. Stir together the flour, salt, baking powder, dill weed and garlic powder.
  3. Make a well in the center and pour in the ham, cheddar cheese and green onions. Mix lightly.
  4. Pour in the cream and using a wooden spoon, stir the dough just until evenly moistened and you have no dry flour left in the bottom of the bowl.
  5. Pat the dough down evenly into the prepared cake pan.
  6. Score them almost all the way through into 8 to ten wedges
  7. Bake at 350 degrees until the top is a nice golden brown and a wooden skewer comes out clean. When done, turn the oven off and sprinkle a little bit (or a lot) more cheese on the top of the scones. Put back in the oven just long enough to melt the cheese.
  8. Turn out of pan onto a wire rack and let cool at least ten minutes before cutting. Cut the scones into wedges using the score marks as your guide.
  9. Serve warm with butter. These can be reheated by nuking for about 20 seconds.


Print Friendly and PDF

The Most Important Meal Of The Day

Blueberry Cornmeal Pancakes

Blueberry Cornmeal Pancakes


I always thought that was either dessert or cocktail time, but according to those in the know (who btw are the same ones we refer to when we say “they say”. Who ARE “they” anyway?! Should I be frightened? Wearing a tin foil hat? Anticipating uncomfortable probes and personal questions about my junk food habits?)

Sorry… had a “Ooo, shiny thing” moment there. Erhmmm, where was I? Oh yeah. According to those in the know, dessert really isn’t the most important meal of the day. Would you believe it’s not even considered a MEAL!? Obviously, “they” have never been in a room full of food bloggers. Supposedly, breakfast is the most important meal of the day. Fuels you for the rest of the day, stops you from eating too much later, blah blah blah. I still want chocolate cake. I don’t LIKE breakfast. When I get up, I just want a cup of strong tea and Pachebels Canon In D to wake me up soothingly. Otherwise, it’s not pretty.

I DO however like breakfast for dinner. Back in the day, when I was a waitress at Shoneys (many many moons ago) I used to love their breakfast buffet. Every Friday, Saturday and Sunday night at 10pm, down went the salad bar and up went the breakfast bar. Sausage, eggs, bacon, pancakes, those sliced strawberries in that neon red probably carcinogenic glaze…ahhh, fatty heaven on a plate.

So every once in a great while, I make my family Breakfast For Dinner (yes, you must capitalize those words. It’s the law. THAT’S how big a deal it is). It involves copious amounts of greasy meat, enough syrup to put an elephant into a diabetic coma, eggs, biscuits and pancakes. Gotta. Have.Pancakes. Also the law. Honest.

But today I didn’t want regular pancakes. So I looked around and found one for Blueberry Cornmeal Pancakes in my King Arthur Whole grains Cookbook. But… it required whole wheat pastry flour. Not something I keep around and not something I was willing to buy just for this. So I looked around online and what I have here is an amalgamation of about 3 recipes. These are light and fluffy but with a slightly different texture due to the cornmeal and also with a nice blueberry tang as well as a touch of zip from the lemon zest. Add in a touch of cinnamon and some vanilla and the result was some darn yummy pancakes. So g’wan… get out the syrup.

Blueberry Cornmeal Pancakes

  • 1 1/4 cup flour
  • 3/4 cup cornmeal (NOT cornmeal mix, just plain cornmeal)
  • 1 teaspoon salt
  • 1 1/2 teaspoon baking powder
  • 3/4 teaspoon baking soda
  • 1 tablespoon sugar
  • 3 eggs, separated
  • zest from one lemon
  • 1 1/2 teaspoons vanilla extract
  • 1 teaspoon cinnamon (more or less to taste)
  • 2 cups buttermilk
  • 3 tablespoons melted butter
  • 1 6 ounce container fresh blueberries, rinsed and gently patted dry
  1. In a large bowl, mix the dry ingredients together.
  2. Beat the egg yolks until well mixed then add the buttermilk to them. Add the melted butter, vanilla and lemon zest.
  3. Pour the wet ingredients into the bowl of dry ingredients.
  4. Beat the egg whites until stiff then fold into the flour mixture.
  5. Gently fold in the blueberries.
  6. Cook the pancakes until they are golden brown on both sides on a hot griddle that you liberally greased with butter.


Print Friendly and PDF

Playing Favorites

Almond Pecan Praline Bread

Almond Pecan Praline Bread


You know how your parents always said that they didn’t have any favorites among their kids and they loved you all equally? They lied. We ALL play favorites. Not intentionally, not maliciously, but we do it anyway. It’s human nature. With people (your kids or whoever), you can love them all just as MUCH, but there are always people you click with differently..better..on a deeper level somehow. That’s the same reason you end up with a spouse or partner. You…just…click.

It’s no different with foods. Everyone has favorites. Foods or flavors that just click with you. Most of us (the normal ones anyway) love chocolate and will use any excuse to eat it. Others love vanilla anything. Put something with lemon or other citrus in front of yet another person and they will devour it. What’s one of mine? Other than all of the above lol?

Almond. Not so much the actual nut To me, they tend to be rather flavorless and I don’t like the texture, though slivered or sliced and toasted is a whole different story. but no, I mean things flavored with almonds. be it almond extract, almond paste, almond filling, marzipan, whatever, I absolutely love anything with almond flavoring. And I add it to as many things as I can think of that it will go with.

One of almonds favorite places to call home is in my stomach in baked goods. Cookies, yeast breads, coffee cakes, muffins and on and on. It’s yummy in all of them. My favorite way is in a quick bread. We love quick breads here anyway (keep my husband away from my Chocolate Chip Banana Bread or nobody else will get any.) so making one with almond flavoring in it was a natural for me. But I couldn’t leave well enough alone and added some praline pecans to this one.

This is just a basic quick bread. The fun comes from the almond flavoring and the pecans. They totally make this bread. Spread this bread, still slightly warm from the oven, with raspberry, cherry or apricot jam and you will be in heaven. Those fruits are so complementary to almond. This is great for dessert, breakfast, a snack or just cause you’re darn cute and deserve a slice or twelve.

Almond Pecan Praline Bread With An Almond Glaze

  • 3 cups flour
  • 1/2 teaspoon salt
  • 1 1/2 teaspoons baking powder
  • 2 14 cups sugar
  • 1 1/4 cups vegetable (or canola) oil
  • 1 1/2 cups milk
  • 2 teaspoons almond extract
  • 2 teaspoons vanilla extract
  • 6 ounces praline pecans
  • GLAZE-
  • 1 cup powdered sugar
  • 1 teaspoon almond extract
  • 3 tablespoons milk (more or less as needed to make drizzling consistency)
  1. Grease and flour 5 mini loaf pans. You can also use cooking spray. Preheat oven to 350 degrees.
  2. In a large bowl, mix together all your dry ingredients, except for the pecans
  3. In another bowl or a large measuring cup, combine your wet ingredients.
  4. Make a well in the middle of the dry ingredients and dump in the wet ones.
  5. Mix JUST until combined. As I’ve said before, don’t overbeat quick breads and muffins. You will end up with tough tunneled bread.
  6. Fold in the pecans, then spoon or scoop the batter into the prepared pans.
  7. Bake at 350 until golden brown and a skewer inserted into the middle comes out clean.
  8. Let cool in pans on wire rack for about ten minutes if you plan on then turning them out or just leave them in the pan on the rack until completely cool if giving them away… though I’m not sure why you’d do that.
  9. To make the glaze, just combine everything in a small bowl. Drizzle it over the cooled breads.
  10. Eat. Say Yum!


Print Friendly and PDF