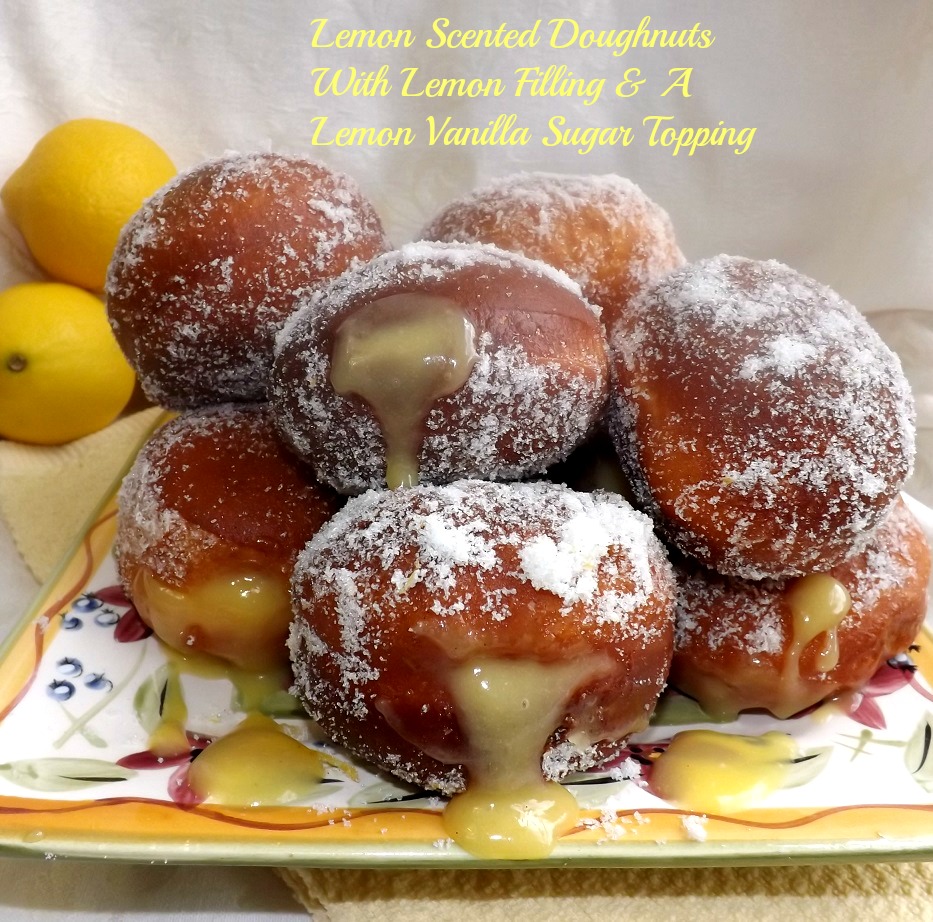
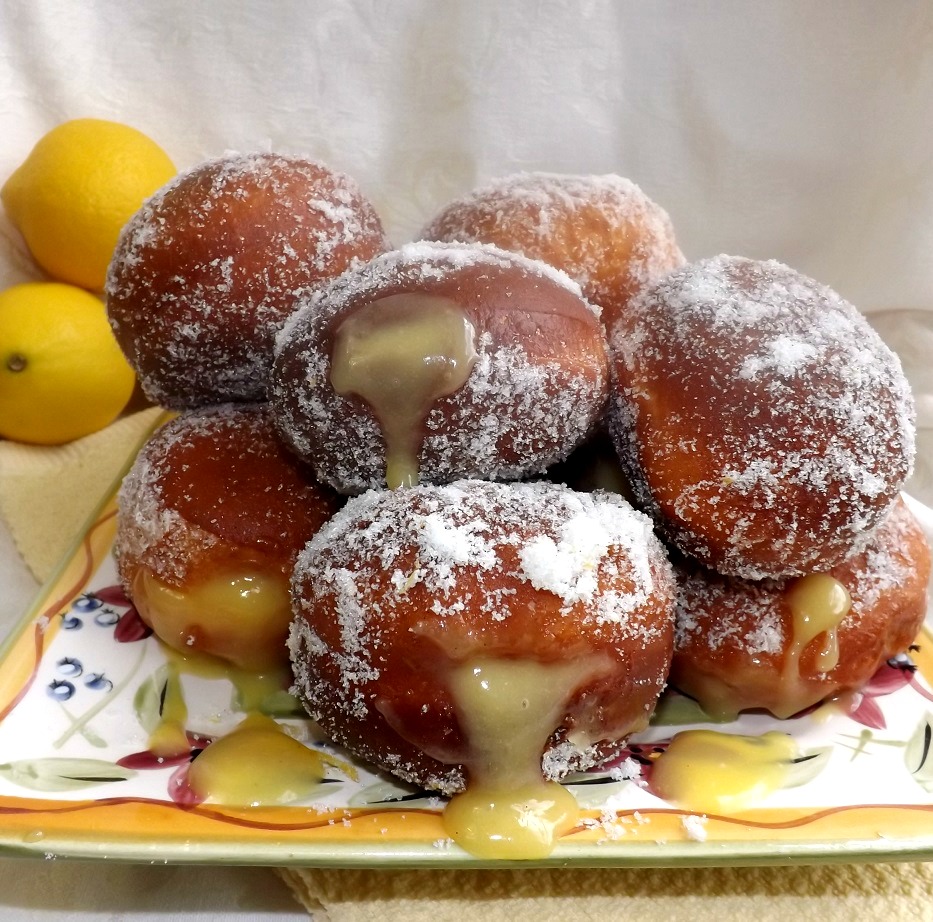
Lemon Scented Doughnuts With Lemon Filling & A Lemon Vanilla Sugar Topping

After I made these, I was talking with a dear friend about deep frying, doughnuts and the lack of good doughnuts even in her neck of the woods; New York City. Now, of all places in the states, wouldn’t you expect the most well known city around to have good doughnuts? But according to her, nope, not really. Add in that she has a strange fear of deep frying and homemade doughnuts simply aren’t happening for her. Mind you, these are the first ones I’VE made since I made these delicious ones. But I still don’t have a deep frying phobia. I fry chicken…wait, I don’t deep fry that… I fry potatoes… wait, I tend to roast them… ok, so maybe I don’t deep fry but once a year or so myself.
These were totally worth the trouble though. The doughnut itself is only mildly sweet. The draw with it is the crispy outside and that tender, fluffy inside. It also has a light lemon flavor. But then, ahhh, but then, you have a filling of creamy lemon curd and after that, they are coated in a crunchy, divinely scented lemon vanilla sugar. You want these.
Obviously, these take a bit more time and effort than some of the things I post, like cookie bars or quick breads. But I have faith in you. You’ve got this.
Also, you will probably have some lemon sugar left. Do NOT toss it. You can use it in tea, baking, even as a sugar scrub if you add a bit of olive or coconut oil.
Lemon Scented Doughnuts With A Lemon Filling & A Lemon Vanilla Sugar Topping
- Doughnuts-
- 2 tablespoons water, about 115 degrees
- 1 package (not a full strip) dry yeast
- 3 1/2 to 3 3/4 cup flour
- 1 cup milk, warmed to between 112 to 117 degrees
- 1/4 cup unsalted butter, room temp
- 3 egg yolks, room temp
- 1/4 cup sugar
- 1 tablespoon vanilla extract
- 1 teaspoon lemon oil
- 1 teaspoon almond extract (it doesn’t make it taste almondy; just is a complement to the lemon)
- vegetable oil or some other neutral oil
- Filling-
- One batch of lemon curd (you may not use it all. You won’t mind that.) Your best bet is to make this a day ahead of time, so it has time to chill and finish thickening up
- Topping-
- 1 1/2 cups sugar
- zest from two large lemons (about 3 to 4 tablespoons)
- beans scraped from 3 vanilla beans (if you have no vanilla bean, you can either omit this or carefully sprinkle about 1/2 teaspoon of vanilla extract over the batch of sugar, making sure to mix well)
- Make your dough first. Pour the yeast into a small bowl. Pour the two tablespoons warm water over it, stirring to combine. Let it sit until it is starting to bubble and foam, about five minutes. In a small In the bowl of a stand mixer (as I have said before, you can always do any yeast dough I post by hand with a heavy spoon or with a good hand mixer), combine the yeast mixture, 3 cups of the flour, butter, warm milk, egg yolks, sugar and flavorings. Use the dough hook on low speed to combine, scraping the bowl as needed, until you have a soft sticky dough, then turn the mixer up to 2. Add in more flour, a quarter cup at a time, until you have a tacky, only slightly sticky dough that has come together in a ball around the hook.
- Dump the dough into a oiled bowl, turning so both sides are oiled. Cover and let rise in the bowl until about doubled in bulk, about 45 minutes to an hour.
- While the dough rises, make the sugar topping. In a medium bowl, simply combine the sugar, lemon zest and vanilla bean seeds (or extract). Stir well and let sit. When you use it, the mixture will have hardened some due to the moisture in the lemon zest. Just use your hands to stir it around.
- When the dough has risen, punch it down and then dump it out onto a lightly floured board or counter. Roll it out into a rectangle about 1/2 inch thick. Cut out circles of desired size (I used a 2 inch diameter cutter) and lay them on a lightly floured cookie sheet. Let rise until slightly puffy, about 30 minutes.
- While they rise, pour about 2.5 inches of oil into a heavy duty pot (I used my dutch oven). Heat slowly to 350 degrees. When the oil is ready, carefully drop two to four doughnut rounds (don’t crowd the pot; use good judgment based on the size of pot you used) into the oil. Let cook until golden brown, about 1 to 2 minutes per side. Watch your oil temp and adjust as needed. Too low and you have greasy doughnuts. Too high and the outside browns before the inside cooks.
- As they finish, transfer them to a rack set over a cookie sheet to cool.
- When cool, carefully roll each doughnut in the lemon sugar until coated then scoop some lemon curd into a pastry bag fitted with a simple hole style tip. Push the tip into the middle of each doughnut and squeeze some lemon curd into the middle. Serve with extra lemon curd for dipping if you so desire… and believe me, you’ll desire.
- If you want them to be more thoroughly coated with the sugar mixture, roll them in the sugar while still slightly warm, and don’t fill with the lemon curd until they are cool. Then, when cool, roll them one more time in the sugar and fill with the lemon curd.
Lemon Scented Doughnuts With Lemon Filling & A Lemon Vanilla Sugar Topping
Copyright Notice: From Cupcakes To Caviar images and original content are copyright protected. Please do not publish these materials anywhere without prior permission.
I simply could NOT resist adding this one in here, too, hehehe