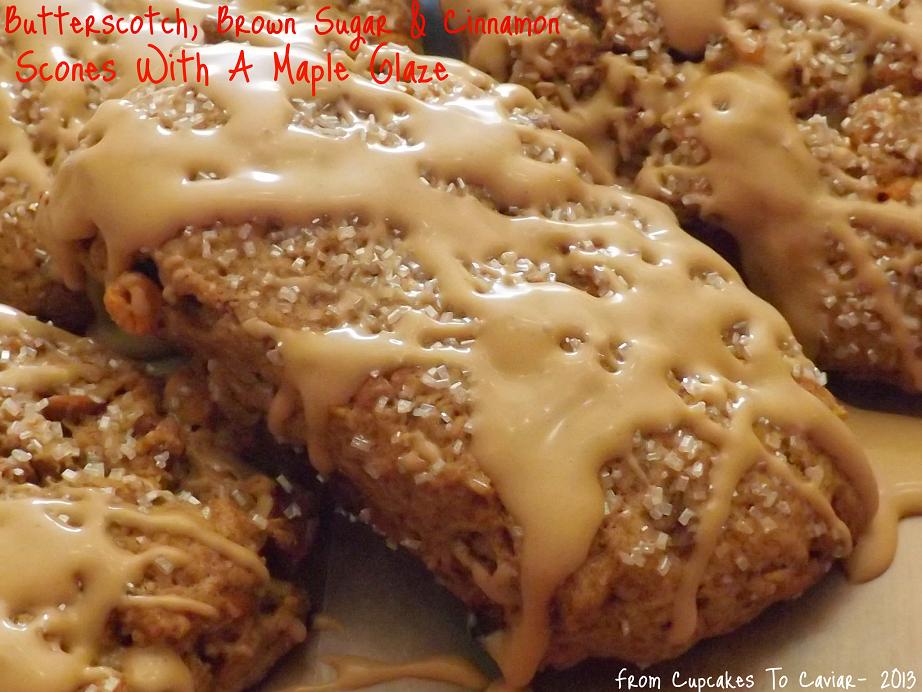
Butterscotch Brown Sugar & Cinnamon Scones With A Maple Glaze

I remember the first time I read about scones. it was when I was in my early 20’s, way back before the days of the internet and 900,000 recipes about ANYTHING. I was reading a cheap romance set in Scotland. The heroine (whom I remember as being a total spoiled pain in the arse) was whining about being hungry and the maid of the hero (whom I remember as being a total sexist pain in the arse) gave her an oat scone. Since I’ve been fascinated with food culture for most of my life, I was intrigued at the idea of a scone. So when I finally found a recipe, years later, I just had t make them.
They sucked.
The first ones I ever made were made with an oat flour (ground up oatmeal), raisins (they called for currents but those weren’t easily found here in the states back in the day), butter and other assorted ingredients I can’t recall. They were dry as dust, tough and crumbly all at the same time with a taste that was like…well… ground up oatmeal with some raisins in it.
Being me though, I didn’t give up. Just like with bread pudding, which I hated when I first tried it, I had to keep trying. Now, I absolutely love scones. You can find quite a few of them here on the blog.
These are quite yummy. They are reminiscent of the packs of instant brown sugar and maple oatmeal that we all ate as kids (and that I personally still love). But no dry as dust texture. They are soft and flaky (I slightly overcooked mine by accident and they are still good) and the cinnamon brown sugar flavor accented by the maple glaze is outstanding (am I the only one who every single time I use the word outstanding I think of the old saw {that made no sense} about “yeah, he was outstanding… outstanding in the field”. WTH does that even mean???). The butterscotch and cinnamon chips in them just gives them that “I can eat these for breakfast OR dessert” feel. All in all, a very good scone.
You know the drill…..
Butterscotch, Brown Sugar & Cinnamon Scones With A Maple Glaze
- 3/4 cup chopped toasted and cooled pecans
- 1 1/2 tablespoons cinnamon
- 1/4 cup dark brown sugar
- 4 tablespoons unsalted butter, chopped into small pieces,cold
- 1 tablespoon solid shortening, chopped into small pieces, cold
- 2 cups flour
- 1 teaspoon cream of tartar
- 1/2 teaspoon baking soda
- 1/2 teaspoon salt
- 1/4 cup sugar
- 1/4 cup buttermilk
- 1/2 cup heavy cream
- 2 tablespoons vanilla extract
- 1/2 cup butterscotch chips
- 1/2 cup cinnamon chips
- sanding sugar for sprinkling on top of scones (optional- I like the touch of sweetness and mild crunch)
- Glaze-
- 1 cup powdered sugar
- 1 teaspoon cinnamon
- 3/4 teaspoon maple flavoring
- 3 to 6 tablespoons heavy cream (may need more or less to get to drizzling consistency)
- Preheat oven to 400 degrees and lightly grease a large baking sheet.
- In a small bowel, mix together the pecans, brown sugar and cinnamon. Set aside
- Mix together your buttermilk, cream and vanilla extract and set aside.
- Mix together your flour, baking soda, cream of tartar, sugar and salt. Using a pastry blender, cut the butter and shortening into the flour until it is fully combined and in tiny pieces. Stir in the pecan/brown sugar mixture.
- Make a small well in the center. Pour in the buttermilk mixture all at once. Using a wooden spoon, stir together to make a moist cohesive dough. Make sure all the flour is combined in and you don’t have dry streaks. Gently fold in the butterscotch and cinnamon.
- Dump the dough out onto a lightly floured board. Pat into a rectangle of about 1/2 inch thick.
- Using a sharp knife dipped in flour or a pizza cutter (they work great for cutting doughs) cut the dough into either 8 large scones or 12 smaller ones. Your choice there. If you look and think that 12 is too small, remember that these will spread as they bake.
- Lay the scones, close together but not touching, on the prepared baking sheet. Sprinkle with the sanding sugar if desired.
- Bake at 400 for about 14 to 18 minutes for large scones or until browned and firm on top. For small ones, bake for about 10 to 13 minutes or until browned and firm on top.
- Let cool on a wire rack until completely cool.
- For glaze, in a small bowl, combine all glaze ingredients and using a whisk, whisk well until mixture is smooth and creamy. Drizzle over cooled scones.
Copyright Notice: From Cupcakes To Caviar images and original content are copyright protected. Please do not publish these materials anywhere without prior permission.