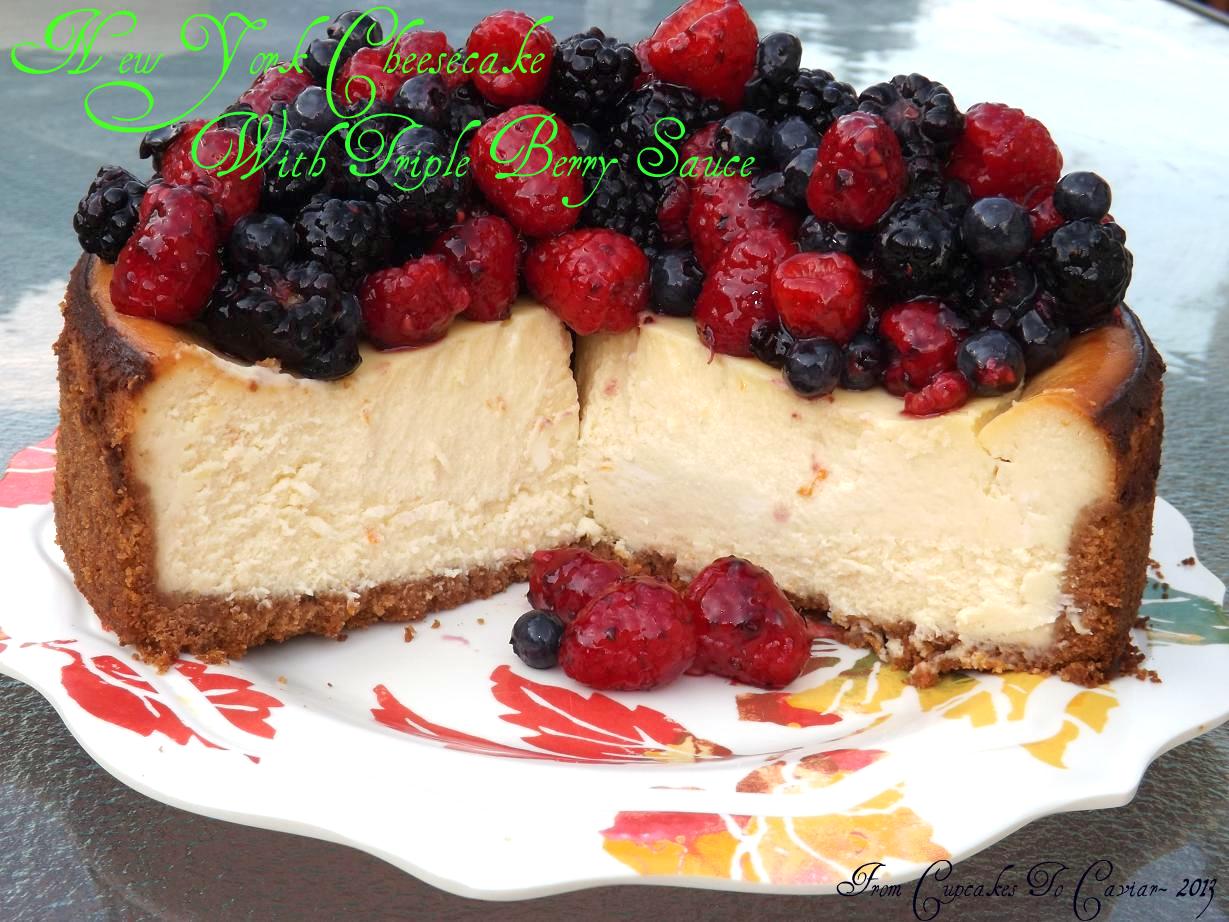
New York Cheesecake With Triple Berry Sauce

I’ve always gotten a kick out of the regional competition between different parts of the country when it comes to food. Being born and raised in Chicago, I saw a lot of it there. Chicagoans will tell you that you can’t get sausage as good anywhere but there… and they would be correct. They will also tell you that the way they make hot dogs is the best… and they would, again, be correct. Then there’s pizza. While Chicago is known for deep dish, believe it or not, a native Chicagoan will tell you that Chicago is more known for thin crust pizza. And yes, it’s better there. I didn’t have deep dish pizza until well into adulthood. Go figure.
Other parts of the country will arguments over other foods, such as where in the south you can get the best fried chicken or the best shrimp and grits (both foods dear to my heart…and stomach), where the best bagels are available (from all accounts that would be New York but never having been there, I can’t say) down to even where you can get the best coffee (Seattle ostensibly but again, I couldn’t say)
One thing most people won’t argue about though is where one can get the best cheesecake. New York wins that. While, like I said, I’ve never been there (*sobs* I’m so travel deprived) I’ve tried enough cheesecake to be pretty certain which is the best. And a thick, dense, creamy New York style cheesecake is hard to beat. Though *she says with a sheepish grin* I DO have a liking for those creamy French style Sara Lee cheesecakes. Don’t judge!
You need to give this one a try next time you get a hankering (yes, I just said hankering…what of it? 😛 ) for cheesecake. It is, as I mentioned above, thick (boy, is it thick), dense and creamy. Plus, with the quick berry sauce on top, it goes from wonderful to “omg, back away from this cheesecake cause it’s all mine!”.
This is fairly quickly put together. It takes a while to cook and then to chill but it’s worth the wait. Mine took longer than the recipe said it would by about 50% time wise but that could be my oven, who knows. This originally comes from Cooks Illustrated and I really didn’t chance much other than I added 2 tablespoons of flour (I have bad luck at times with cheesecakes that don’t contain a touch of flour so I just put a bit) and I added the lemon and orange zests. The berry sauce is also mine but there’s nothing fancy about it though it looks it. All it is is berries and some softened up jam. I prefer uncooked berry sauces over cooked because 1) they’re easier and 2) you don’t lose the fresh flavor of the berries by cooking them. I also opened the door for a minute at the stage of turning the oven down to 200 because when researching this recipe, I read a LOT of reviews saying that theirs burned but those who said they propped the door open for a minute didn’t have that issue. I love the mild citrus flavor they added but feel free to omit them if you’re more a cheesecake purist.
You know the drill… git to cookin’.
New York Cheesecake With Triple Berry Sauce
- Crust-
- 5 tablespoons unsalted butter, melted
- 4 ounces graham cracker crumbs
- 1 tablespoon sugar (I used about 2 cause I like graham cracker crusts a bit sweet)
- Cheesecake-
- 5 8 ounce packages of cream cheese, softened
- 1/8 teaspoon salt
- 1 1/2 cups sugar
- 1/3 cup sour cream
- 2 tablespoons flour
- 2 teaspoons lemon juice
- zest from one lemon
- zest from one orange
- 1 tablespoon good quality vanilla extract
- 6 eggs
- 2 egg yolks
- Triple Berry Sauce-
- 4 cups fresh mixed berries
- 1/2 cup good quality berry jam (I used Smuckers Triple Berry Preserves)
- Spray a 9 inch springform pan with cooking spray. Set aside. Preheat oven to 325 degrees.
- To make the crust, combine the crumbs and the sugar. Stir to combine. Then pour over the melted butter and stir well until it’s evenly moistened. Pour the crumbs into the prepared pan and using the bottom of a glass, press them onto the bottom and halfway up the sides of the pan. Place in the oven and bake for about 12 minutes or so, until they are lightly browned. After you take it out, turn the heat up to 500 degrees (yes, you read that right)
- For the cheesecake- in a large bowl, using a hand mixer (I have tried a stand mixer with this recipe and it simply doesn’t get the bottom of the bowl well enough and you end up with lumps of unmixed cream cheese), beat the cream cheese until smooth and creamy with no lumps. Scrape the bowl once or twice during the mixing.
- Add in the sugar and flour and beat until combined, about one minute. Scrape the bowl again, then add the lemon juice, zests, sour cream and vanilla. Beat at low speed until combined. Add the egg yolks, then beat until combined. Add the eggs, 2 at a time, and beat each time until well combined.
- Spray the cheesecake crust with cooking spray (yes, the crust… ), set the crust on a baking sheet (in case of drips) then pour the batter into the prepared pan. Bake for 10 minutes at 500. Then turn the heat down to 200 degrees. Prop or hold the door open for about 45 seconds or so so heat goes down a bit quicker then close it back.
- bake at 200 degrees for about an hour and a half (like I said up there, mine actually took closer to 2 hours but that may be my oven so check yours at the 90 minute mark.
- You want this to come to 150 degrees on an instant read thermometer. It should be set except in the center 2 inches or so of the cheesecake. It’s ok if it is VERY slightly jiggly there. It will firm up during the cooling process.
- Transfer to a wire rack and let cool until barely warm, about 3 hours. Using a butter knife, run it along the edge of the pan between the crust and the pan. This will help loosen it up. Wrap tightly and refrigerate until cold, about 3 hours.
- About an hour before serving, pour your berries in a medium bowl. Gently fold in the softened jam or preserves (you can soften it simply by giving it a good stir before using it). When ready to serve, either spoon the berries on top of the cheesecake or serve in a bowl alongside it.
Copyright Notice: From Cupcakes To Caviar images and original content are copyright protected. Please do not publish these materials anywhere without prior permission.